Andrii Velychko says that festive Easter pastries should be very tasty, because this is the main dish of the bright Christian holiday.
Only a professional will be able to bake lush and tasty paskas.
And it turns out in units, real cooks or housewives.
Do you think so too?
So all this is complete nonsense!
I will share here a clear recipe (well, as clear as possible, believe me) and describe simple rules, following which you will definitely succeed.
What will we bake for Easter?
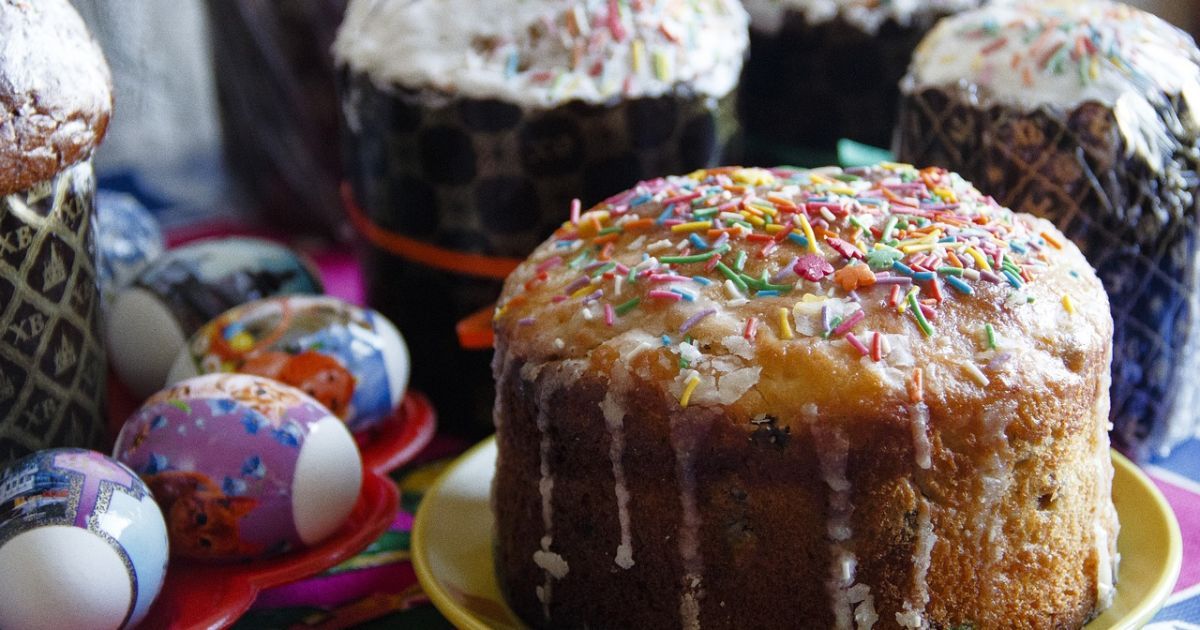
A lush and airy pastry, which in its taste will be very similar to the traditional Italian Christmas cake - panettone.
Therefore, in advance, take care of the availability of all products and inventory, which I will describe below.
And most importantly, set aside a day for this, and dedicate it only to this pastry.
It has been checked more than once, straps are for the whole day.
And follow the rules:
1) Do not be distracted by other matters - you have a day off until Easter.
2) Buy quality yeast.
I used dry ones, just bought them at METRO.
The name "Saf Levure".
Ask the seller - you need yeast with a long life cycle.
3) Put all the ingredients on the table before cooking - absolutely all products must have the same temperature.
This is critically important.
4) Use scales.
Grams are important in baking.
That is why such baking is quite difficult, because I like to cook situationally, "by eye", and this is not allowed here.
Now you can buy accurate scales with an error of 1-2 grams for UAH 200.
5) Try to find "strong" flour.
By "strong" I mean flour with a high level of protein, that is, gluten.
I used pizza flour, what I could find, and regular domestic flour.
But, as practice shows, everything works out with Kulidorovsky flour, or with McFoy.
6) The kitchen where you cook should be free of drafts, wind and cold.
It is ideal to cook in a warm place.
7) Baking any bread, and even more so Pasok, is a little more than just cooking.
This process is somewhat sacred.
Therefore, shout less, be nervous, and fuss less - it definitely won't help the dough rise.
So, we will bake 4 medium paskas
Products
For the dough (this is the first dough):
baking flour - 170 g (1 cup incomplete) I had Italian type 00 for pizza - it worked great and is sold in the nearest store
milk - 170 ml
dry yeast - 15 g
sugar - 20 g
For the main dough:
Italian flour - 170 g
domestic wheat flour - 360 g
milk - 230 g
honey - 15 g
vanilla extract or vanilla bean
yeast - 2 g
sugar - 150 g
yolks - 120 g
butter - 225 g
salt - 10 g
zest of 1 orange and 1 lemon
candied fruit - 450 g
rum - 100 g
oil (unscented) for greasing hands
Inventory
several medium metal bowls
plastic spatula for dough
several kitchen towels
paper forms for belts
wooden skewers at least 25 cm long
food film
kitchen scales
How to cook
I will describe the entire cooking process step by step, and sequentially in time.
Therefore, do not skip each step and everything will work out.
Step 1
Prepare all ingredients and inventory.
It is convenient if you measure everything in advance in a container - a cup.
Also prepare the inventory.
It is very inconvenient when the search for some small thing slows down the whole process.
Photo: Andrii Velichka's Facebook
Step 2
We are preparing steam.
Opara is such a living dough, in which yeast begins to come to life and it helps our paskas to rise and grow.
Sugar helps the yeast.
Therefore, at this stage, we heat the milk a little (literally to 30-35°C, no more! The liquid should be barely warm, if you don't have a thermometer (and I don't have one), then focus on the feeling of your hand - the milk should not seem warm.
If you overheat the milk, the yeast will die.
And that's all.
Therefore, heat up a little milk, dissolve yeast and sugar in it.
Knead the dough with a spoon.
It will be quite thin.
It should be covered with cling film and left to rise.
I still cover with a towel.
According to the idea, the foam will increase by 2-2.5 times in 30-40 minutes.
During this time, you need to take 2 more steps.
Photo: Andrii Velichka's Facebook
Step 3
Let's prepare the candied fruit.
In general, whatever candied fruits/dried fruits you have, use them.
It's a matter of taste and there are absolutely no rules here.
I had raisins (1 type, black, but very tasty when there are several types of raisins), dried apricots and dried cherries.
I washed it, chopped dried apricots and poured alcohol over everything.
I used rum, 100 grams. You can also use other alcohol, for example, cognac or whiskey.
Soak and periodically stir.
If you manage to soak candied fruit in alcohol in the evening, it will be great, but it is not critical.
Photo: Andrii Velichka's Facebook
Step 4
Knead the main dough.
Everything is the same, first we mix the liquid ingredients - milk, honey, egg yolks, vanilla, and then we add yeast and sugar to them.
After that, we knead the dough.
For kneading, I use a mixer and a dough attachment.
If you have a dough bowl - it's great and will make your life a lot easier, but you can also use your hands, longer, but you can.
Photo: Andrii Velichka's Facebook
When the dough is homogeneous, add the foam and continue kneading.
Only after that, in small batches, 3-4 times, we introduce soft butter with orange and lemon peel, and now we must add salt.
I often forget to add salt, and this is important.
Salt improves taste and stabilizes yeast growth.
Photo: Andrii Velichka's Facebook
Step 5
Kneading
The dough must be carefully kneaded - that's why I do it in 3-4 stages.
Knead the dough with a mixer for a few minutes, then let the dough rest and the mixer, covering it for a few minutes with a towel.
And so 3-4 times.
An indicator that the dough is ready, it becomes matte and lags behind the vessel in which you are kneading.
Banal - the dough has become very elastic and rubbery and no longer sticks to the bowl in which you knead it.
Photo: Andrii Velichka's Facebook
Step 6
The first rise - cover the dough with food plastic and send it to a cozy, quiet place to rise a little.
I recommend putting a towel under the bowl and covering it with a kitchen towel on top.
Everything depends on the temperature in the kitchen and the quality of the yeast, but as practice shows, the dough will rise twice in 30 minutes.
Photo: Andrii Velichka's Facebook
Step 7
First knead the dough and add candied fruit.
Pre-strain the candied fruits from the rum (I don't pour it out, and then I will soak a piece of pasca for breakfast - it's great) and add them to the dough.
You can knead for a few more minutes with a mixer or use your hands to evenly distribute them over the volume of the dough.
I did it with my hands - poured candied fruit on the dough and folded the dough crosswise several times.
In general, this criss-cross folding makes it possible to obtain a good fibrous structure of the finished tape.
Step 8
The second ascent.
Take a large bowl, the dough should triple in size.
Grease the bowl with oil and your hands too - now transfer the dough into it.
It is already very pleasant.
A little warm and does not stick to hands.
Cover the bowl with cling film, wrap it again in kitchen towels and leave it alone to rise.
In terms of time, it can be a couple of hours.
When the dough increases in volume by 2.5-3 times - it's time to start the next stage.
Step 9
The last kneading of the dough and the formation of strips.
Grease the table with oil.
Grease your hands with vegetable oil and put your aromatic dough on the table.
Knead the dough a little (without fanaticism, gently, just a little).
Next, with the help of a plastic scraper-spatula, divide it into equal parts.
This recipe yields about 2100 g of dough, which is 4 strips of 525 g each. I used paper shop forms with a diameter of 13 cm and a height of 11 cm. Take each piece of dough and form a ball from it, roll the edges inwards down.
How do you round it off?
You will have a nice ball on top in your hands.
With this beautiful side, lay it out to form so that the beauty is on top.
This is about half the form.
Put on a baking sheet and send to a rack.
Step 10
Rack
There is an easy way to speed up proofing (this is the last rise of the dough before baking).
I use the oven turned off - I put a baking tray with strips in it, and put a large cup of boiling water on the bottom.
And I close the turned off oven.
The steam evaporates and heats the oven, creating a warm and humid atmosphere.
And these are ideal conditions for the dough to rise.
So the dough should double in size and completely fill the baking form and even grow a little above it with such a cap.
Step 11
Baking.
When you see through the glass that the dough has risen, carefully remove the baking sheet with strips from the oven.
Be careful - do not shake or beat - so that the dough does not fall.
Turn on the oven to heat up.
It's about 10 minutes.
Then send the strips to bake.
It took me 40 minutes at 170°C.
In addition, for the first 5 minutes, only the bottom heating, and then the baking mode, or top-bottom with minimal convection.
But take into account the peculiarities of your oven - if it burns - cover it with wet parchment, if it is white for a long time - increase the temperature.
As a child, I watched dozens of pasaks being baked at the same time in a wood-fired oven, that was mastery.
Therefore, we have nothing to do with modern ovens, temperature transmitters and heating and temperature regulators!
Check the readiness either with a skewer (by piercing the finished dough with a wooden skewer - nothing should remain on it) or with a thermometer (the temperature of the finished dough inside should be 98°C).
Photo: Andrii Velichka's Facebook
Step 12
Rest of ready-made belts.
The most important thing is not to eat them right away.
Banal - you will have a hard time after that, hot butter dough is not the best option for the stomach.
Italians recommend turning their panettone after baking.
After all, the pulp is so tender and light that the hat can easily push through it and fall.
Since we are preparing pasca with an Italian accent, everything is simple - pierce the pasca at the base with a skewer.
And turn over, holding the skewer.
The belt seems to be hanging on a wooden skewer.
And fix for the night in this form upside down.
It is convenient to do it between two boxes or chairs.
You can only taste it in the morning.
I forgot to take a photo of the skewers while cooking.
I don't decorate belts.
But who loves - everything is simple - proteins with sugar and nuts with candied fruit.
Or white chocolate.
Or chocolate glaze made of dark chocolate.
Or any other favorite cream - to your taste.
My favorite is to soak a piece of paska with rum in which candied fruit has been soaked, and eat it with a glass of cold milk.
You can afford this for Easter.
Cook with pleasure!
Brand-chef Andriy Velichko
Andriy Velychko is one of the few chefs in Ukraine who received a culinary education at the Institute of Paul Bocuse, the creator of "new French cuisine".
On his Facebook page,
he shares interesting recipes and cooking secrets with his readers.
Read also:
Paska krafin: aromatic and original
A quick recipe for panettone on yeast
Glaze for paska: four interesting recipes